Discover creative projects where Quilling Meets Cardboard! Explore unique DIY crafts combining intricate quilling techniques with versatile cardboard designs. Perfect for crafters of all levels.
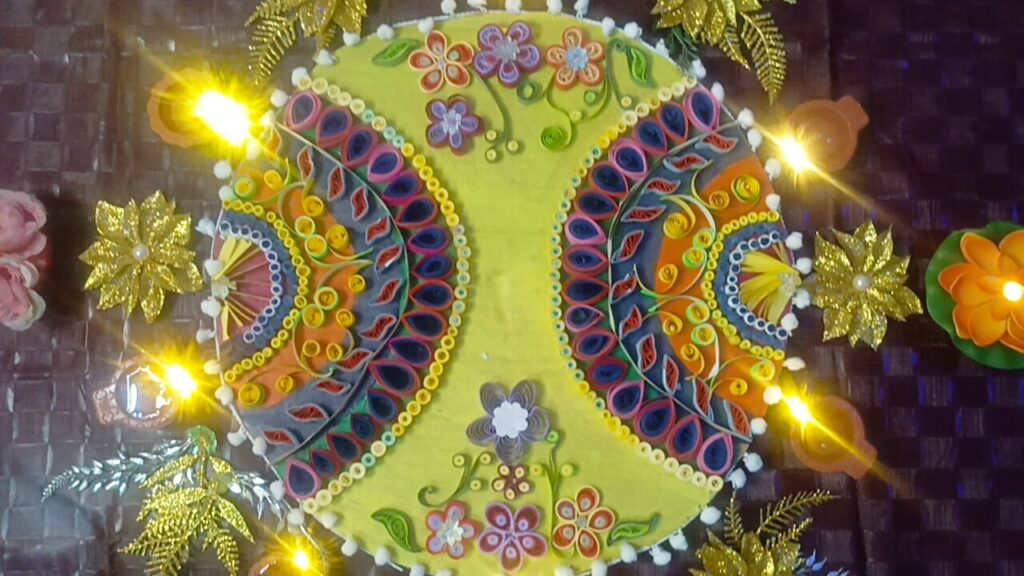
Diwali, the festival of lights, is a time for joy, togetherness, and creativity. Every year, global households light up their homes, decorate spaces, and bring in the festive spirit with vibrant rangoli designs. But what if you could take your traditional rangoli further this Diwali? Imagine combining quilling and cardboard to create a unique, eco-friendly rangoli design that not only looks stunning but also lasts longer than a typical powdered rangoli.

In this article, we will explore how you can bring a twist to your Diwali decorations by merging the timeless art of quilling with sturdy cardboard as the base. Whether you’re an experienced crafter or someone looking to try something new, this step-by-step guide will help you create a mesmerizing DIY Rangoli for Diwali 2024.
Table of Contents
What is Quilling?
Quilling is an art form that involves rolling, shaping, and gluing strips of paper to create intricate designs. When “Quilling Meets Cardboard,” this traditional craft takes on a new dimension, combining delicate paper filigree with sturdy cardboard for unique, 3D creations.
This ancient craft has evolved over centuries, allowing people to express creativity through simple materials. Today, quilling has expanded into a variety of crafts, including jewelry, home decor, and now, rangoli designs.
Quilling is a wonderful medium for those who love detailed work. Using colorful strips of paper, you can create flowers, swirls, and other beautiful shapes that can be incorporated into your rangoli design.

Why Use Cardboard as a Base?
The use of cardboard as a base for rangoli brings several advantages:
- Durability: Unlike traditional powder rangoli, which can smudge or be disturbed, a cardboard rangoli is sturdier and can last for days or even weeks.
- Eco-friendly: Cardboard is a recyclable material, making it a more sustainable option for your festive decor.
- Versatility: Cardboard can be cut into any shape, allowing you to experiment with different forms for your rangoli.
Combining quilling with a cardboard base creates a rangoli that is not unique but also reusable, reducing waste and contributing to an eco-friendly Diwali celebration.

Materials You’ll Need
Before diving into the creative process, gather the following materials:
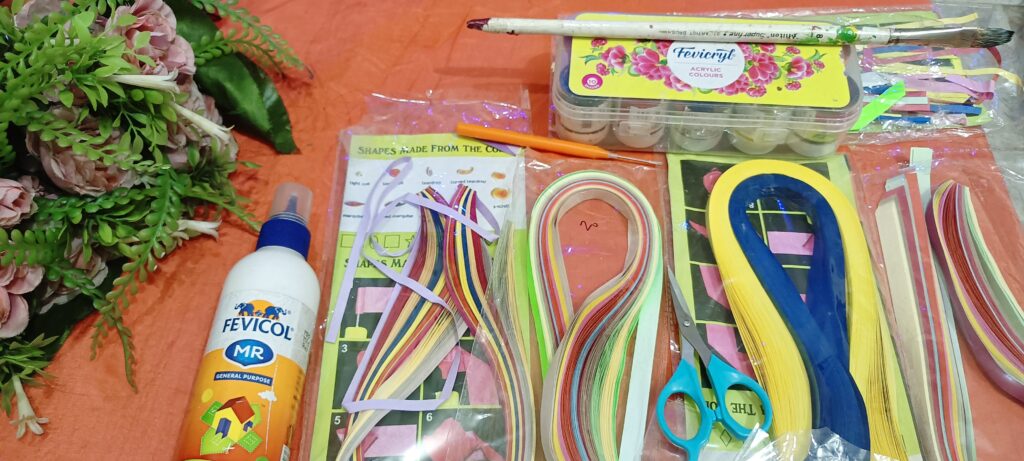
- Cardboard sheets: Choose a sturdy yet thin sheet of cardboard. You can repurpose old boxes to stay eco-friendly.
- Quilling strips: Available in various colors, these thin paper strips will be the primary element for your design.
- Quilling tools: These include a slotted quilling tool, a needle tool, and tweezers for precision.
- Glue: A strong adhesive is essential for holding your quilled shapes and other elements in place.
- Paints or markers: Use these to color your cardboard base before starting the quilling process.
- Scissors and craft knife: For cutting out your cardboard shape and trimming the quilling strips.
- Ruler and compass: To help in marking and designing a symmetrical rangoli layout.
Step-by-Step Guide to Create Your DIY Quilling Rangoli
Step 1: Design the Layout
Start by visualizing what you want your final rangoli design to look like. You can keep it simple with floral patterns or go intricate with traditional Diwali symbols like diyas and peacocks. Once you have an idea, sketch it lightly on your cardboard base using a pencil.
For a more symmetrical design, use a compass to create circular designs or a ruler to measure even distances for your quilling shapes. Symmetry plays a crucial role in traditional rangoli designs, and your cardboard quilling rangoli is no different.
Step 2: Cut the Cardboard Shape
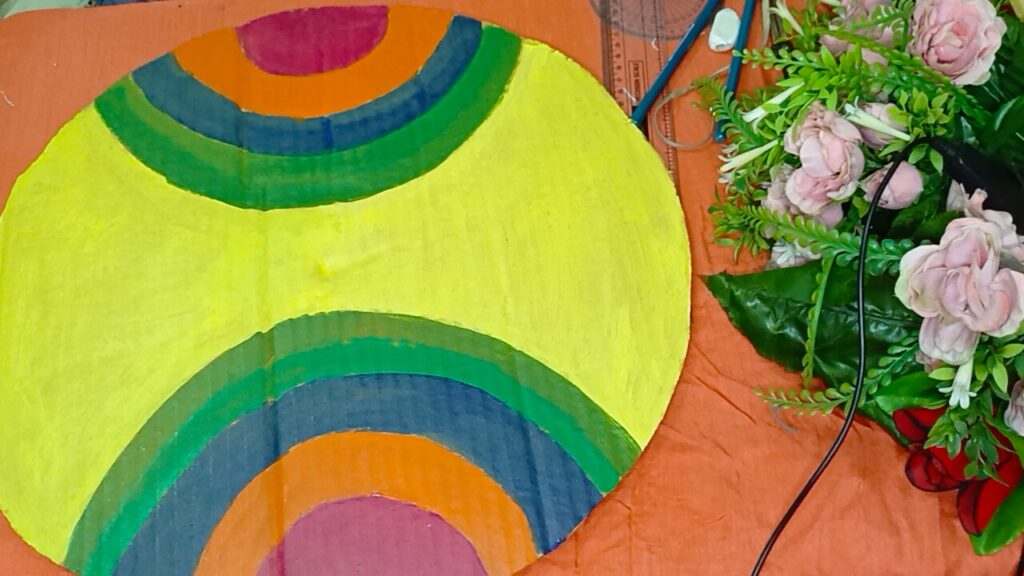
Once you’ve outlined your design, cut the cardboard into the desired shape. You can opt for a round, square, or even freeform shape, depending on your space and preferences. Be sure to smooth out the edges with a craft knife or scissors for a clean finish to make the best quilling meets cardboard rangoli.
Step 3: Prepare the Quilling Strips
Now comes the fun part – quilling! Choose the colors for your design based on the traditional Diwali palette: reds, oranges, greens, yellows, and blues. Begin rolling the quilling strips into coils, shapes, or patterns that will fill your cardboard design. Some common quilling shapes include:
- Tight coils: Basic circular shapes that form the foundation of most quilling designs.
- Loose coils: Allow the paper to unravel slightly for a softer look.
- Teardrops: Press one side of a coil to create a teardrop shape.
- Scrolls: These free-form shapes add movement and flow to your design.

Step 4: Paint or Color the Cardboard Base
Before you begin attaching your quilled elements, paint the cardboard base to complement your quilling colors. For example, a dark background (like black or deep blue) can make bright quilling colors pop, while a lighter base can give your rangoli a softer, more traditional look.
Step 5: Assemble the Quilling Design
Using tweezers and glue, start placing your quilled shapes onto the cardboard base according to your design sketch. Begin with the center and work outward, adding larger quilled pieces first and filling in with smaller details as you go.
Remember to allow each section to dry before moving on to the next. This prevents any accidental movement or distortion of the quilled elements.
Step 6: Add Final Touches
Once the quilling design is complete and dry, you can add some final touches to enhance the overall look of your rangoli. Consider using:
- Beads or sequins: These small embellishments can add sparkle and dimension to your design.
- Glitter or metallic paints: Use these to highlight specific areas or give your rangoli a festive shimmer.
- Decorative borders: Draw or paint an outer border to frame your design and make it stand out even more.
Benefits of Creating a Quilling Cardboard Rangoli
Creating a quilling meets cardboard rangoli not only showcases your artistic side but also offers several practical benefits:
- Reusable design: Unlike traditional powder rangoli, your cardboard creation can be stored and reused for multiple occasions.
- Eco-conscious crafting: Repurposing cardboard and using paper quilling reduces your environmental footprint during Diwali.
- No mess, no stress: Quilling and cardboard eliminate the mess of colored powders and make it easy to create and maintain a clean, vibrant design.
Tips for Beginners
If you’re new to quilling or cardboard crafting, don’t be afraid! Here are some helpful tips to get you started quilling meets cardboard rangoli:
- Start small: Begin with a simple design like flowers or geometric shapes before attempting more intricate patterns.
- Use templates: There are plenty of free quilling templates available online that you can use to practice different shapes and techniques.
- Patience is key: Quilling is a meticulous process, so take your time to enjoy the journey rather than rushing to the finish line.
How to Store and Preserve Your Cardboard Rangoli
One of the biggest advantages of creating quilling meets cardboard rangoli is its reusability. Here’s how you can ensure your rangoli stays in good condition for future use:
- Protect it from dust: After Diwali, cover your rangoli with plastic wrap or store it in a large, flat box to prevent dust accumulation.
- Avoid moisture: Store it in a dry place, as humidity can cause the cardboard to warp and the quilled paper to lose its shape.
- Handle with care: When moving or storing your rangoli, be gentle to avoid bending the quilled elements.
Conclusion
This Diwali, let your creativity shine with a quilling meets cardboard rangoli. Not only does this DIY project allow you to experiment with new techniques, but it also contributes to a more sustainable and eco-friendly celebration. By combining the delicate art of quilling with the sturdiness of cardboard, you can create a unique, reusable rangoli design that will wow your family and friends for years to come.
So, why not try something different this year? Gather your materials, follow the steps, and get ready to dazzle with your DIY Rangoli for Diwali 2024!
